Sweet and Spicy Zucchini Pickles
August 28, 2011
 My mom taught me how to can. In fact, she was full of useful instruction when I was a kid including: how to make my bed (hospital corners), the art of the thank you letter, and the ever-so-wise tip: “If you can’t say something nice, don’t say anything at all.” (I seem to have forgotten this last one recently and so I am resurrecting it as my new mantra- I think it will serve me well.) Though I do still try to do my best with thank you letters, I admit to having given up on the tightly made bed (duvees are the way to go!) The canning skills I learned from her though, are still extremely relevant and useful. I took it for granted growing up that the pantry was always full of a variety of delicious jams. It was not until I was older that I realized how few people my age knew about this practical art. Gratefully, the art of preservation is experiencing a resurgence. Just look at the popularity of sites such as Punk Domestics and Food in Jars.
 My first canning projects were jams: apricot , raspberry, blueberry. My mom showed me how to carefully sort the fruit, meticulously wash the jars, fill them leaving just the right amount of head-space, and secure them with clean lids and bands. It was a fun activity to share and I of course loved to taste the fruits of our labors. Over the years, I branched out in quantity (such as the 200 jars I made for our wedding favors out of our 20 square foot college kitchen) and variety by adding in pickles and relish, as well as applesauce and curds.This recipe is not one of my childhood. It has become a family favorite none-the-less, born out of necessity as my parents’ garden expanded and they learned that three of four zucchini plants really are
 extreme plenty for a two-person household.
 Sweet and Spicy Zucchini Pickles is the recipe that makes me yearn for our zucchini plants to over-produce. No matter how many jars I make each year, it is never enough. By February or March, I find myself rationing them so that we have enough to last until the next harvest. Sweet, tangy, and crunchy with just a little bit of spice. These are a staple on our weekend lunch table. They are great on sandwiches or on their own.
What tips did your mother teach you that you still put to use?
Read the rest of this entry »
Apple Blackberry Cake
August 24, 2011
 Summer is not complete without a morning spent picking blackberries. Last weekend, under the pressure of a fall-like chill in the air and the craziness of back to school time, the kids and I pushed out for a ramble along the creek. We brought the wagon, a gazillion containers, and a baby doll or two. We dressed in our jeans and forced socks and closed shoes onto our spoiled summer feet. We were ready for a real berry picking session. What we found however is that like all other summer fruits (tomatoes especially!) everything is super late this year.
 Not about to let a little thing like red under-ripe blackberries get us down, we assigned ourselves roles for our Blackberry Team. I picked the berries, my little man dumped the small containers into the bigger ones, and my little lady dragged the wagon up and down the trail laughing hysterically. After an hour of hard work (and just a few scrapes), we cruised home with a half-gallon of berries. Just enough for a few smoothies and Apple Blackberry Cake. While we suffer a shortage of ripe blackberries, we have boxes and boxes of Gravenstein apples from my parents’ trees.
 Apple Blackberry Cake is a treat to make each late summer or fall. Though it is simple to prepare, somehow the cake has the ability to pass as both an elegant special dessert and a casual weeknight treat. This time it even disguised itself as a birthday cake. The apples are peeled and sliced and then pressed into a basic butter and brown sugar batter. The blackberries scatter across the top lending both a colorful burst and a tart contrast to the apples. The sugar and cinnamon sprinkled over the top help to form a nice sweet crunchy topping. This cake is well matched with whipped cream or vanilla ice cream. I would not mind eating a slice for breakfast either with a nice cup of coffee.
Read the rest of this entry »
Grilled Corn Relish
August 17, 2011
 Great corn is finally here. Though tomatoes top my list of most lusted after summer food, corn is a close second. This summer it seems everything is a bit late, so the wait for these iconic summer foods is all the more tortuous. Corn though, is now at its peak. The other day I loaded up on fresh corn at the local market. To my husband’s credit, he did not flinch when I presented him with an extra 18 ears of corn to grill alongside our dinner items for the night.
 Grilled Corn Relish is a staple in our pantry. Each year I make a big batch and still end up having to meter it out over the course of the winter so that we do not run out. Grilling the corn adds a bit of nice charred flavor and some color to this sweet and tangy relish. You may also boil the corn if that is more convenient for you. Bag up any extra cooked corn you have and toss it in the freezer. It is a great addition to lots of other foods like these Cheesy Onion Corn Muffins or Chicken Tortilla Soup. If you do not want to process your jars, you can also keep the jars for months in the refrigerator.
 Serve it with grilled meats, toss it with shredded cabbage for a quick and colorful salad, or use it to top soft tacos (our favorite).
Read the rest of this entry »
Peppered Peach and Rosemary Jam
August 6, 2011
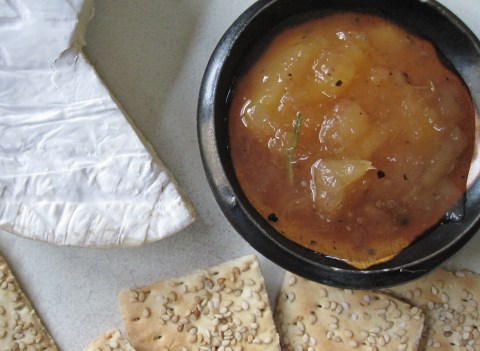 The peaches have been calling me this summer. On my last trip to the farmers’ market, I gleefully strode away with a huge box mounded high with beautiful peaches and nectarines. Fortunately, this coincided with an almost unprecedented two free days without the kiddos. Oh, how productive this mama can be when the children are away!
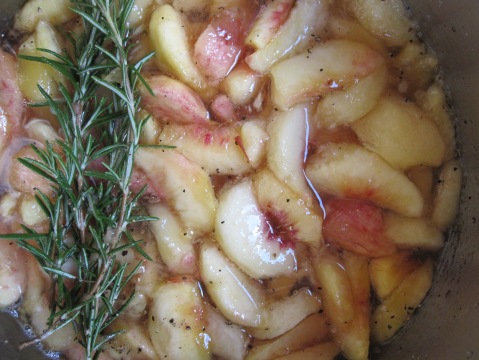 There were enough peaches to make a few different types of products. It was hard to resist making the Perfect Peach Cake (it really is soooo good), but I did. Instead a made a batch of pie filling inspired by this recipe from Mrs. Wheelbarrow. A few pounds went to making a puree for peach ice cream (still working out the kinks on that recipe). With the bulk of the peaches I made one of my favorite pantry items, Peppered Peach and Rosemary Jam.
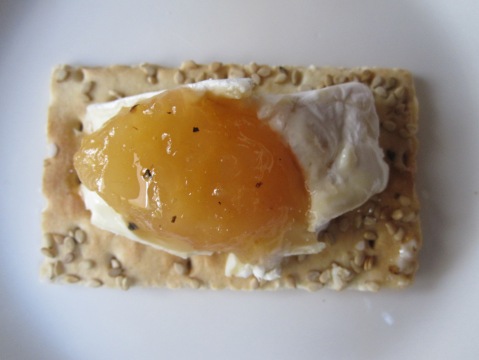 This jam is special. Sweet white peaches, earthy rosemary, and just a hint of spice from the cracked pepper, the combination is delightful. I serve it with cheese such as brie or chevre. It is a definite crowd pleaser and an excellent hostess or holiday gift.
Peppered Peach and Rosemary Jam
adapted from Martha Stewart
makes 5 half-pints
3 pounds white peaches (you can use yellow, but I prefer the white varieties for this jam)
1/3 cup lemon juice
3 cups sugar
4 large sprigs rosemary
1/2 teaspoon coarsely ground black pepper
Peel and pit the peaches. (Very ripe peaches are very easy to peel with a knife. If your peaches do not peel easily, they are probably not ripe enough. If you must make the jam without allowing them to ripen further, you can boil them for one minute, then plunge into cold water to loosen the skin.)
Slice the peaches into 1/2 inch slices. Place peaches in a large bowl, add lemon juice, sugar, rosemary, and pepper. Cover and let stand for 4 hours. Stir every hour to incorporate the sugar.
Transfer peach mixture to a large pot. Bring to a boil over medium-high heat. Cook for 15 minutes, until mixture is syrupy. Lightly mash the mixture to break down peach slices, leave 1/3 of wedges intact. Discard rosemary sprigs (you can fish out the individual rosemary leaves if you want, but I leave some in for color and interest.)
Ladle jam into hot sterile jars. Leave a 1/2 inch head-space. Top with a new lid and band. Process in a hot water bath for 10 minutes for half-pint jars. See Home Canning Basics for more information about the canning process.
Here is a printer-friendly version of the recipe: Peppered Peach and Rosemary Jam
You may also like:

Raspberry Lime Popsicles
July 11, 2011
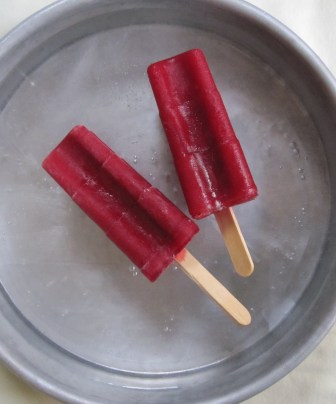 Nothing beats a great popsicle on a steaming hot summer day. Unfortunately, most of the popsicles sold in stores may be cold, but they are full of chemistry kit ingredients. It is hard to find a popsicle made of the real fruit whose taste they claim to bear. Luckily it is very easy to make your own. Popsicles molds make this easier, but they are not essential. You can make popsicles in small yogurt cups, ice-cube trays, or even small mason jars as Local Kitchen did recently.
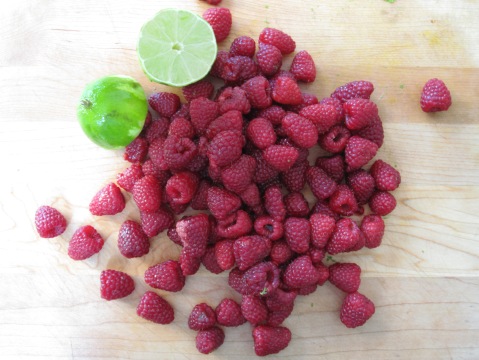 Raspberry Lime Popsicles are loaded with raspberries and just enough sugar to bring out their flavor, without being overly sweet. The lime zest and juice adds a bright tang. Mmmm. Oh, and the color. The color is so vibrant and real. Simply whirl up the ingredients, strain out the seeds, and you are ready pour this raspberry goodness into a mold.
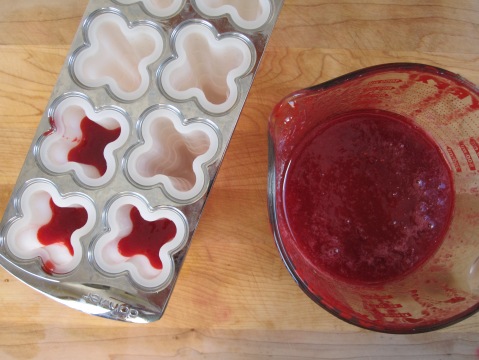 When the popsicles are solid, slip them from the mold for a truly refreshing treat. If you are serving them to kids, you may want to make this an outdoor dessert or at least have a wet rag on hand. We had some very red faces at our house after the kiddos eagerly chomped these down. This is a dessert that grownups and kids alike will love. They are very, very good.
Update: Here is another popsicle recipe that has won over our hearts and appetites! Red, White, and Blue Popsicles


